Ribbon
With the ribbon it is easy to set project and calculation settings together with a comprehensive file menu. The ribbon also contain a tab with all the reports. Finally, you have access to license and help. Each of the items in the side menu has its own tab on the ribbon as well.
The ribbon has seven tabs plus the side menu tabs plus a quick access toolbar.

File
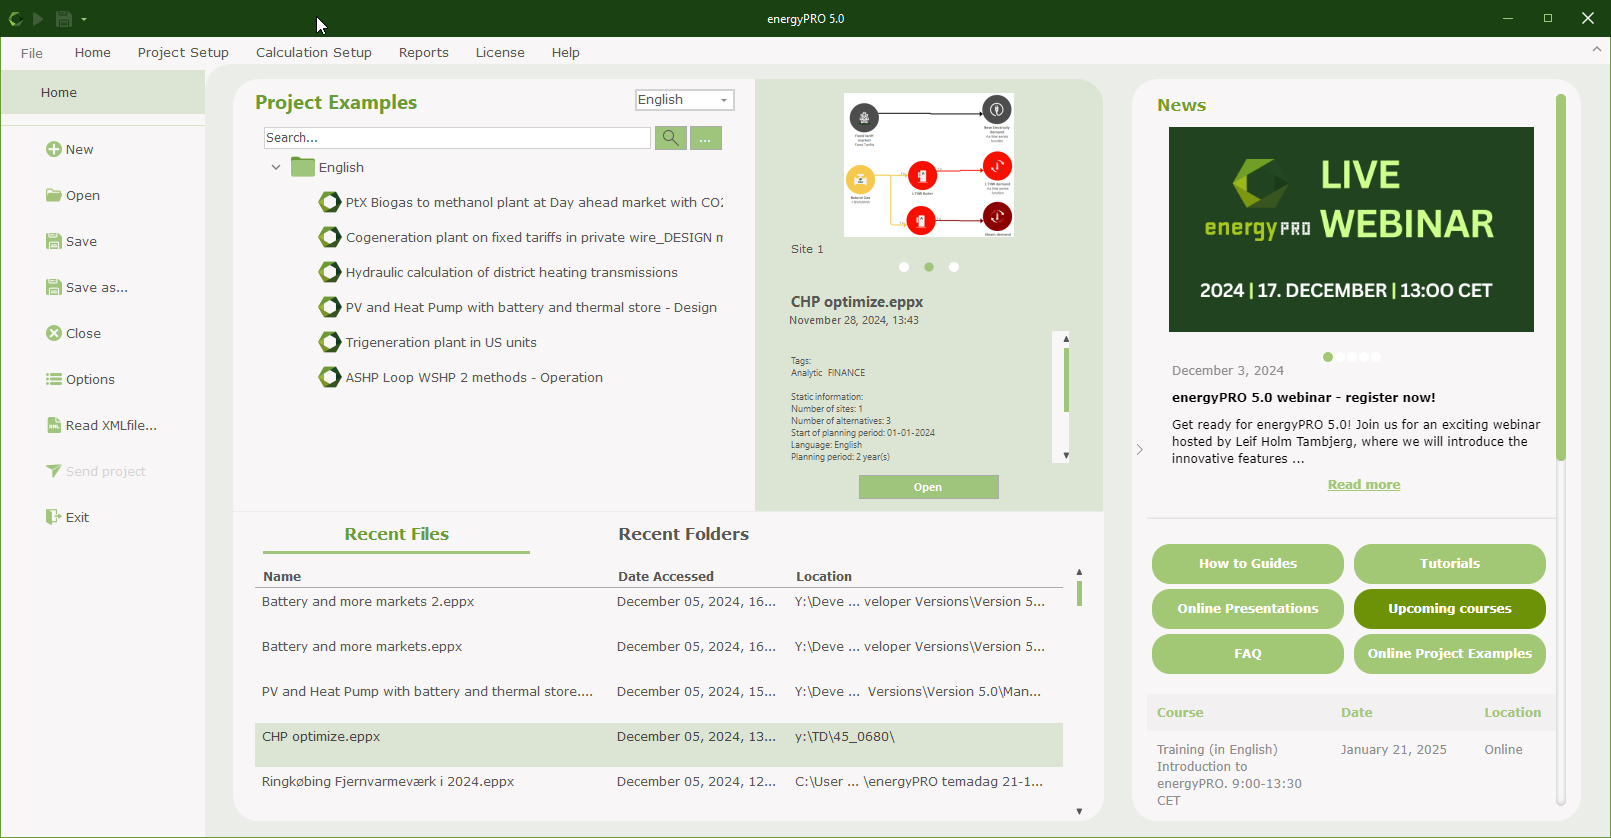
The File tab has three sections, to the left a number of options, in the middle online project files and most recent used files and on the right online access to news, guides, courses etc.
On the left side, where you can select between New, Open, Save, Save as and Close. Next is the Option windows, followed by Read XMLfile used with INTERFACE and finally an energyPRO exit button.
Options
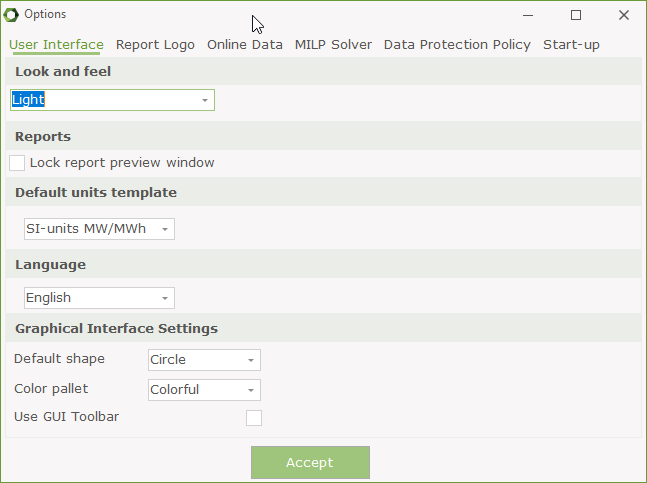
On the options window you have access to a number of settings.
User Interface
Look and Feel Themes
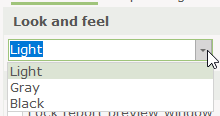
In the User Interface you can select between three different Look and feel themes, Light (default), Gray and Black
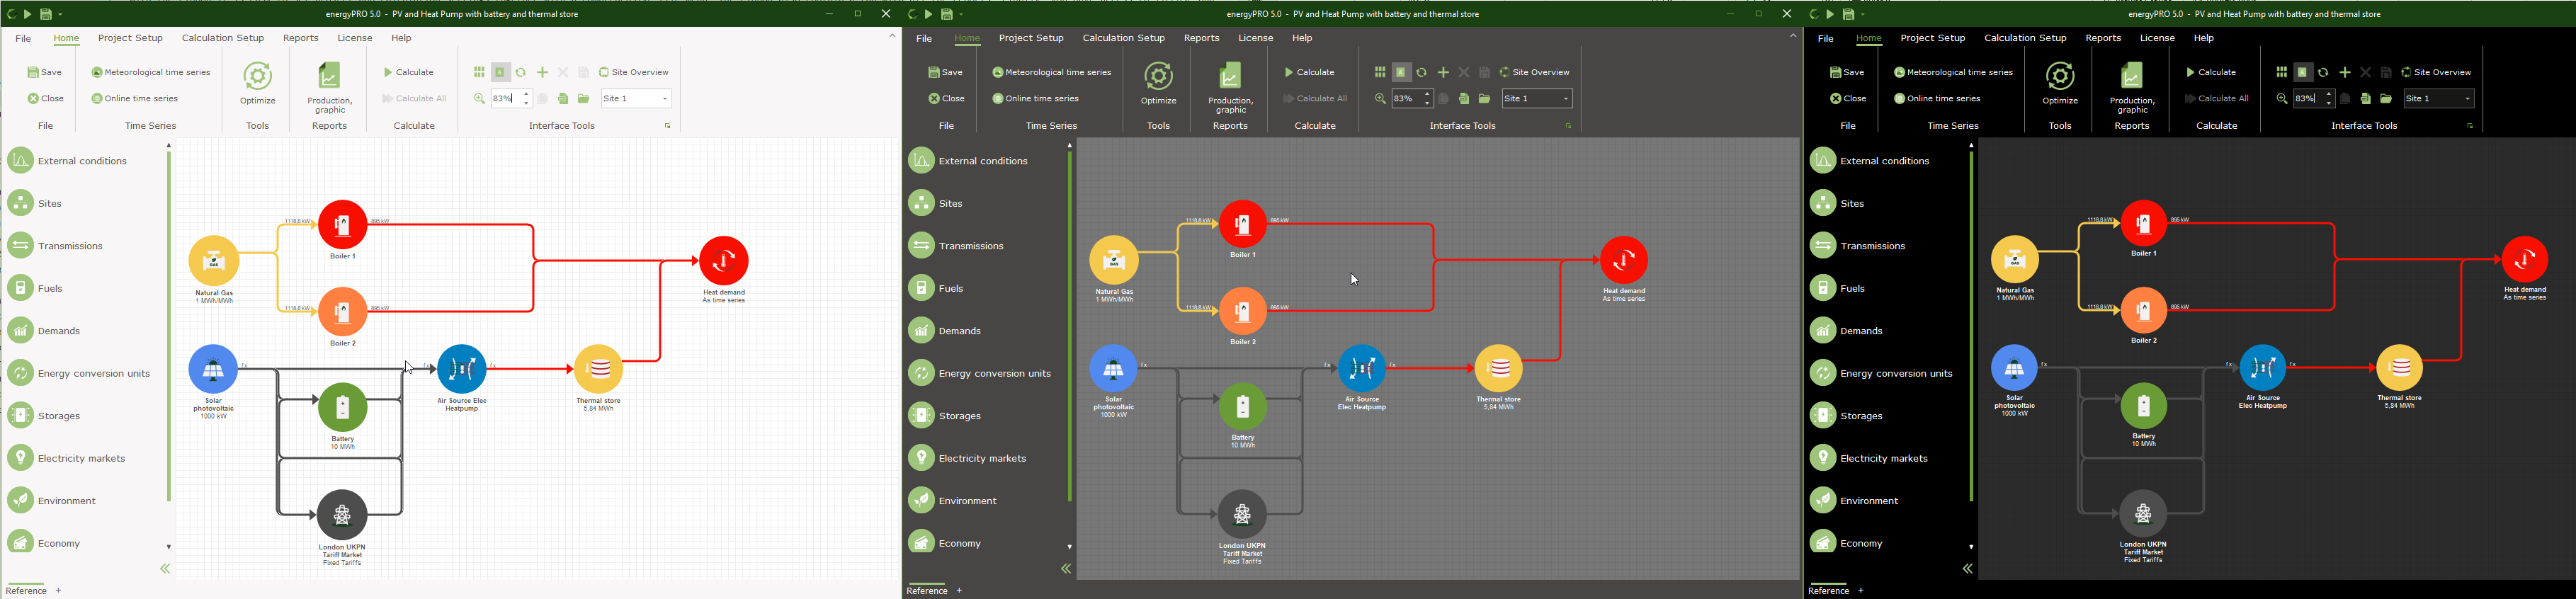
Depending on your selection, energyPRO looks like this.
Reports
In Reports you can enable Lock report preview window. By enabling this you can only see one report preview at the time.
Default Units template
In the section “Default units template”, you can select the default measuring units template. You can select between SI-units MW/MWh, SI-units kW/kWh and US-units or your own user defined template.
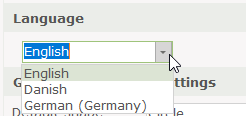
Languages
Select one of the languages specified.
If you select a language that you have not licensed and registered, the program automatically turns into demo-mode.
The first time energyPRO is started, it will be operated in the same language as used by Windows (If the language is available for energyPRO - otherwise in English). If you want to change the language, choose Language in the main menu, select the wanted language and restart the program. If you do not have license to the selected language, energyPRO will start in DEMO-mode.
energyPRO is currently maintained in the following languages: English, German and Danish.
Graphical Interface Settings
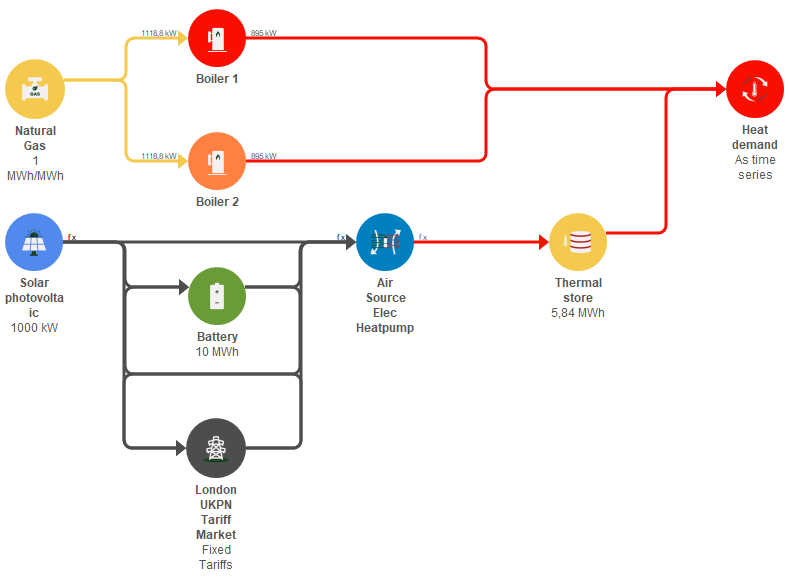
In the graphical user interface you can select between default shapes and a color palette. The default shape can either be Circle or Square and the Color palette can either be Green or Colorful. This is Circle and Colorful.
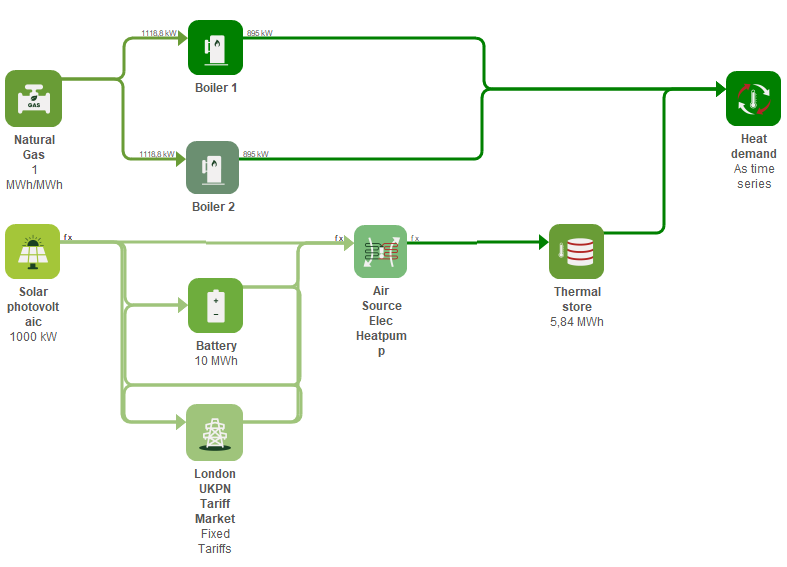
And this is Green and Square.
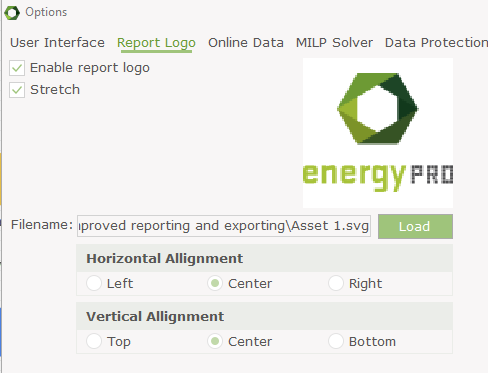
Report Logo
In this menu it is possible to setup a company logo to be used in all the energyPRO reports. The logo will appear in the top right corner of each report.
Online Data
Here it is possible to change the URL specifying the location of EMD International’s online data if needed.
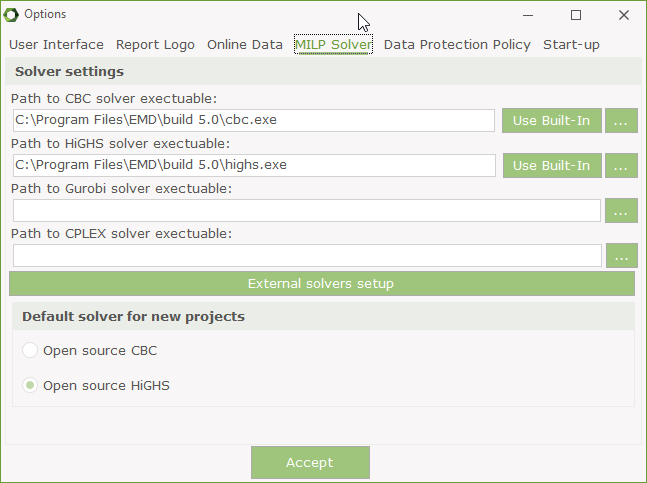
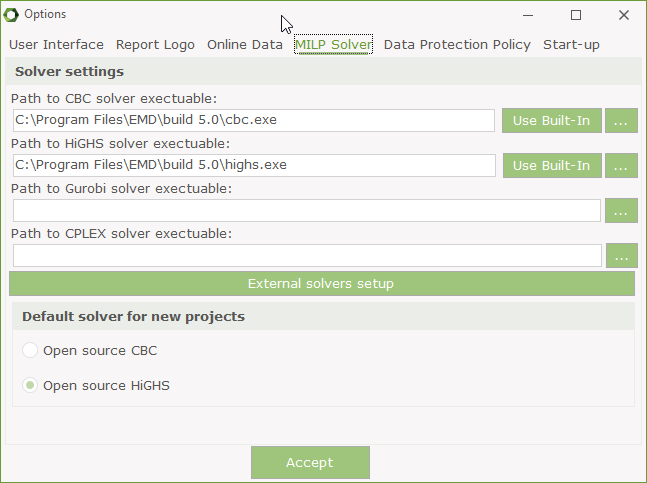
MILP Solver
At this tab it is possible to define your choice of MILP (Mixed Integer Linear Programming) solver. Either use one of the built-in open source solvers, HiGHS or CBC, or one of two commercial solvers, Gurobi or CPLEX. For the commercial solvers, you will need to have a valid license, which is not provided by EMD International. As default built-in solver we recommend HiGHS.
Data Protection Policy
At this tab you get access to view EMD’s data protection policy.
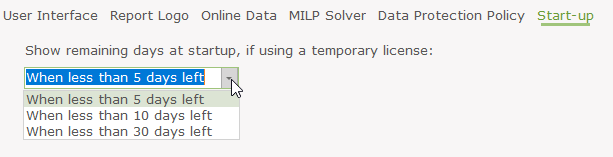
Start-up
If using a temporary license, you can have a warning before it expires. Here you set the period, when the warning shall appear.
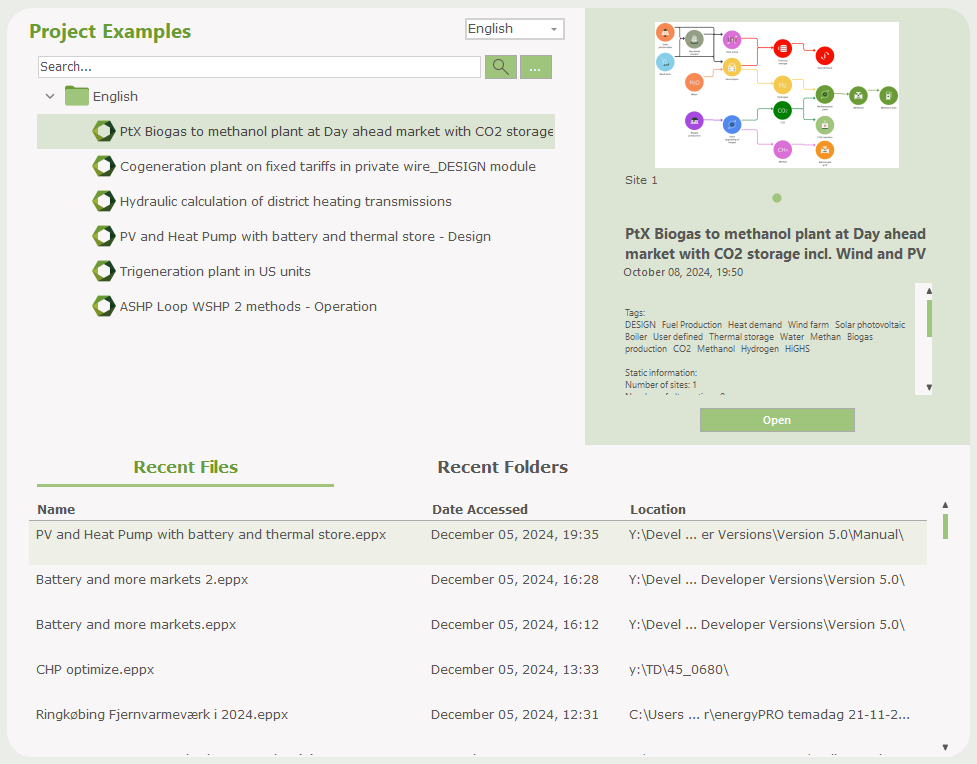
Project examples and recent files
EMD offers a large number of online project examples. It is possible to search among the projects. The search can include tags saved with the project. To the left, the tags, meta data and images of the selected project is shown.
The bottom of this section shows the most recent used energyPRO file, inclusive date of access and location. The tab Recent folders gives access to the most recent used folders.
News
In the News section, you can see the latest news from EMD regarding energyPRO and energy systems. Further you can access upcoming course, how to guides, FAQ, etc.

Home
The Home tab on the ribbon contains a number of most used shortcuts, such as Save or Close, Meteorological or online time series and Production, graphic report. These items can also be found in File, External conditions and Reports, respectively.

Unique for the Home tab is the OPTIMIZE button, which opens the OPTIMIZE window, if you have an active license for OPTIMIZE.
In the Calculate group you can enforce a calculation. If being in a COMPARE project, Calculate will calculate the reference or alternative you are in, Calculate All will calculate reference and all alternatives.
The Interface tools group contains the tools for editing the graphical user interface.
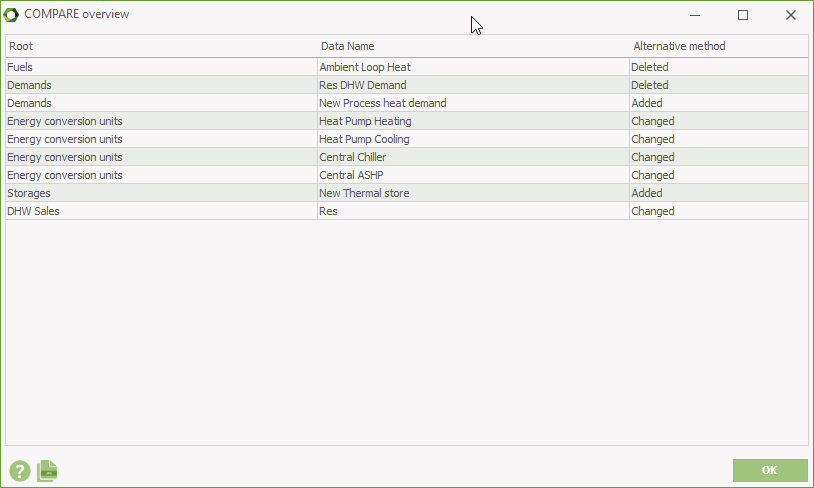
When being in COMPARE, the Compare group is enabled.
The Compare overview present the changes in the alternatives compared with the reference.
Draft comparison of key financial figures
When being in FINANCE or ACCOUNTS and COMPARE calculating multiple alternatives and 10 or 30 years can be a time-consuming task.
When selecting this item energyPRO calculates only the first year of the Reference and all the alternatives and you have this table:
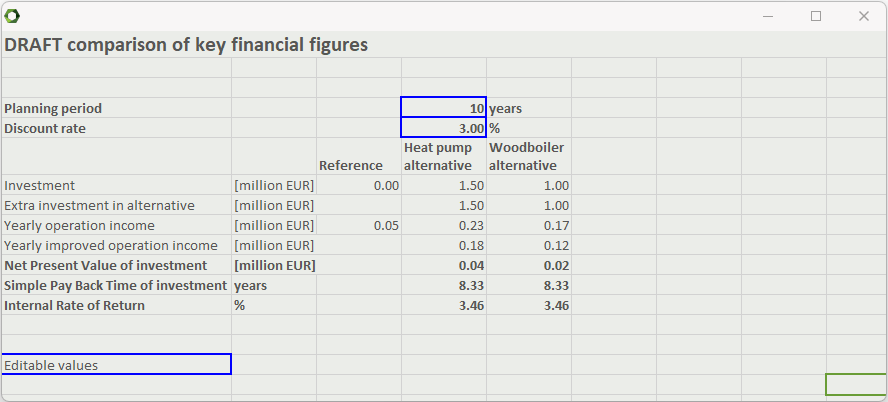
It shows the stated investments and the calculated yearly operation income for the first year for reference and the alternatives. Based on the planning period and discount rate Net Present Values, Simple Pay Back time and Internal Rate of return is calculated. You are able to change the planning period and the discount rate and analyse the impact on the key financial figures.
Project Setup
On the Project Setup tab, settings related to the project are edited, such as planning period, currency, measuring units.
The first setting is the selection of module. Dependent on the module the rest of the tab can change.

Projecting
- The DESIGN module is selected for one-year calculations, with the emphasis on energy conversion and operation costs.
- The FINANCE module is selected for investment analysis. This adds Investments and financing to the DESIGN and includes calculations running over more than one year.
- The ACCOUNT module adds the calculation of income statements and balance sheets to the FINANCE module. Adds depreciation and taxation to the calculation input.
Optimizing daily operation
- The OPERATION module is selected for optimizing the operation in a short period. The content is close to the DESIGN module, but with a few more settings.
The selection of calculation module determines which facilities will be accessible within the project. You can always change your selection of the project module. WARNING: If you change from ACCOUNT to FINANCE or DESIGN the specific ACCOUNTS data will be lost. If you change from FINANCE to DESIGN the specific FINANCE data will be lost.
Meta data
The meta data for a project allows easier identification of the project without the need to open it and is the data used for the project preview. Use this menu to edit descriptions, identification, assumptions and tags for the project.
Selecting the Edit Meta Data opens the Meta information tab on the Project identification window.
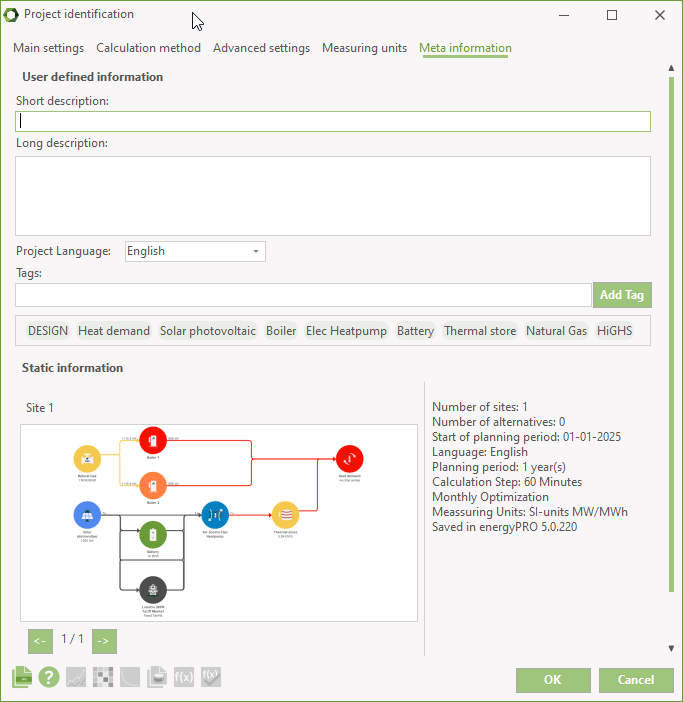
The short and long description replaces the project identification text and assumptions in the Main settings tab on the Project identification.
In Project language, you can set which language is used for naming of the elements in the project.
energyPRO automatically includes a number of tags, depending on the settings and components included in the project. As user you can add your own tags, helping to identify the project.
Finally is included information on number of sites, alternatives planning period, etc. For each site an image is saved.
External Conditions
Planning Period
In the external conditions group the planning period is defined. In From you select the start of the planning period. If in DESIGN, FINANCE or ACCOUNTS, select month and year. If in OPERATION, also select day and time.
In To you select the end of the planning period. If in DESIGN, the planning period is one year. If in FINANCE or ACCOUNTS, select the year of the end of planning period. If in OPERATION, select date and time.
Holidays
Specifying holidays is relevant if holiday dependent fixed tariffs are modelled in “Electricity markets”. Often the electricity tariffs are e.g. lower in holidays. Therefore, it is often relevant to know the dates of these holidays. In the list of functions, available wherever formulas can be made, energyPRO has the function IsHoliday(). IsHoliday() returns 1 if the day is a public holiday, otherwise 0. The present version of energyPRO has the holidays for Denmark, Germany and Great Britain encoded. For Germany and Great Britain the regional differences in holidays are also accounted for, as one will have to choose which region’s holidays are needed for the model. If you are making projects in other countries, and the conditions for e.g. tariffs of electricity differ between holidays and working days, it is possible to type in country specific dates.
When entering the holiday combo box, five options become available.
- No Holidays
- Danish holidays
- German holidays
- British holidays
- Specify holidays manually
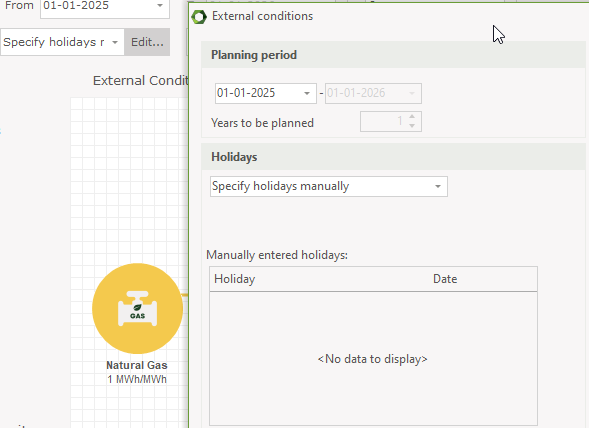
If “Specify holidays manually” is chosen you select the Edit and the External conditions window is available. Here you have to fill in each holiday by a name and a date (format: dd-mm)
It is possible to save and load Holidays. Use the right mouse button while standing in the window for holidays to get access to this facility.
Time zone
When making a new project file, the time zone will automatically be the same as the time zone used by the computer.
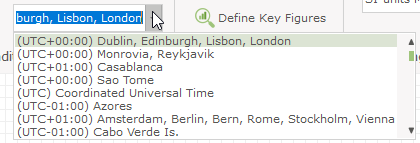
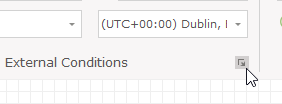
If you are going to work on a project located in a different time zone press the icon in the lower left corner of the group. This will open the External conditions window.
In the Time zone box, select the Edit button.
This gives the following window:
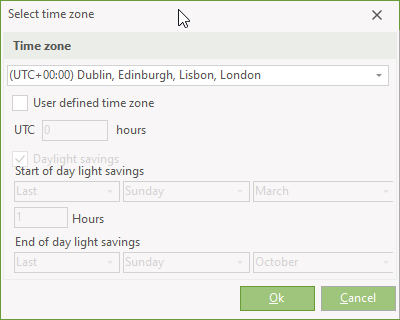
Here it is possible to make a user defined time zone:
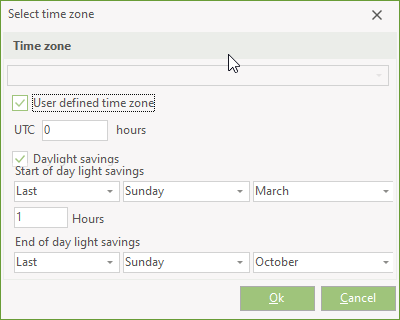
Here you can specify offset to UTC. In this case the time zone is UTC +1 hour. Also, it is possible to enable or disable daylight savings and to detail the daylight-saving settings.
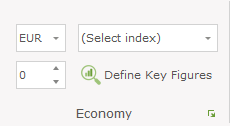
Economy
The Economy group contains the currency settings and a short cut to define key figures.

The currency has a few predefined currencies and it is possible to add your own. The default currency is inherited from the computer’s regional settings.
You can type in key figures by defining their names, formulas and presentation (as percentage or as number).
In FINANCE and ACCOUNTS, two additional settings are available.
Inflation: Select which of your created indexes that describes the inflation.
Nominal discount rate: The nominal discount rate is used for calculating the “Present Value” of the investment. See the report Financial Key Figures
Financing
In FINANCE and ACCOUNTS the Financing group is available.
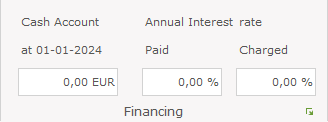
Specify the content of the cash account at project start.
Specify the annual interest for respectively positive (Paid) and negative amounts (Charged).
Measuring Units
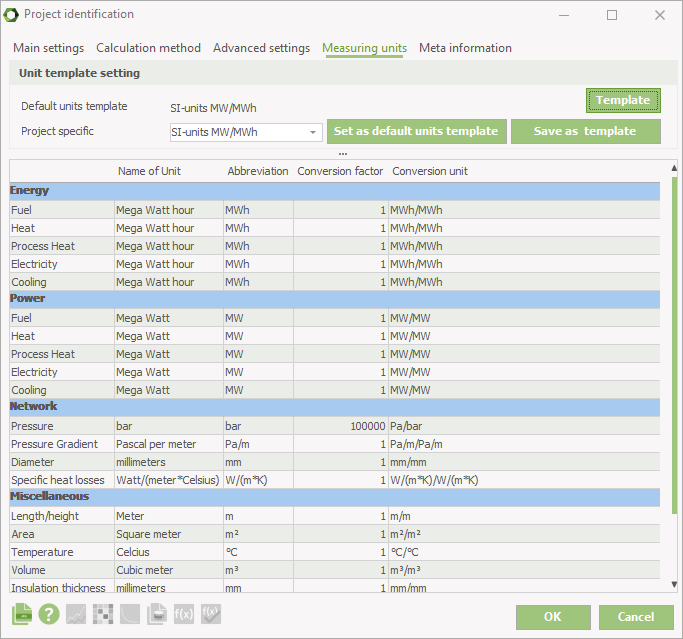
Select the Measuring units used in the project. You can select between MW/MWh, kW/kWh, US units and your own defined sets of units.
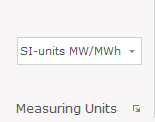
Select the arrow in the lower left corner for detailed settings.
Be aware that the power and energy unit shall be corresponding. Having e.g. heat energy in kWh and heat power in MW will cause incorrect results.
Calculation Setup
Calculation Setup tab contains settings related to the calculation of the project. It consists of five groups.

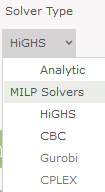
Calculation Method
The Solver Type is dropdown list with the available solvers. energyPRO has two types of solvers. The Analytic is the built-in solver in energyPRO, dispatching production based on net heat production cost, see Methods, Analytical Solver. The MILP solvers use Mixed Integer Linear Programming for dispatching. The HiGHS (recommended) and CBC are included with energyPRO. The commercial solvers Gurobi and CPLEX can be used if available.Regarding the use of MILP see Methods, MILP Solver.
The Analytic solver is the built-in solver developed by EMD over many years.

When selecting Analytic, you have the option of enabling private wire for electricity consuming units.
When enabling private wire, energyPRO will calculate two priority numbers for each electricity producing or consuming unit, one for exporting electricity and one for covering own electricity consumption.
During the energy conversion calculation, energyPRO will recalculate the priority numbers numerous times. Hence enabling this item can make the calculation time consuming.
Selecting any of the MILP solvers, you have different settings.
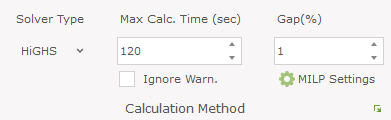
Max Calculation time (sec)
Indicates the maximum time of one calculation. One calculation is considered to cover the length of optimization period. If the length is chosen to be Month and the project is calculated for a year, 12 calculations are going to be performed. The Max. solution time will not affect quick calculations but will stop the optimization if it did not reach a solution with wanted gap (precision) within the specified time. The default value is 120 seconds.
Gap
Gap indicates the precision of calculation which must be reached to stop it. The gap may be interpreted as an indicator of how far the solution is from the optimal one. It is a very important parameter and may highly influence the time it takes to obtain the result. If the gap is set to be a very small number, the calculation may take a long time. The calculation will not be stopped until the gap is reached or the Max. calculation time exceeded. The default value of Gap is 1%.
Ignore Warning
If the Max. calculation time is reached and wanted gap is not met, a warning is displayed . It indicates all the calculations for which the time limit was reached and the gap of the calculation. The solution displayed in energyPRO, after the warning, is the best feasible solution achieved within the time limit. To reach the wanted precision the user should consider increasing the Max. Calculation time. To speed up the calculation it is advised to increase the wanted gap. The warning may be disabled in MILP Settings by selecting this checkbox.
MILP Settings
Access to setting paths to solver executables including external commercial solvers. Further set the default solver for new projects.
Time
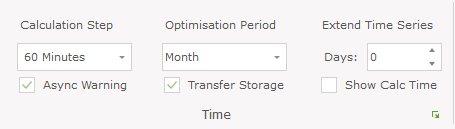
Calculation Step
Calculation Step is default 1 hour (60 minutes) but can go down to 1 minute.
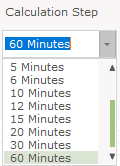
The solver divides the optimization period into steps and this setting defines the size of these steps. The shorter the calculation step, the more precise the optimization ought to be because changes can occur more often. However, shortening the calculation step will increase the calculation time. By default this setting is set to 1 hour since many time series will be in this resolution.
By activating "Async Warning" or "Warning when time series changes asynchronous with calculation step" a warning will be shown if any time series are more detailed than the calculation step.
Optimisation Period
Optimization Period can be Month or Year.
When energyPRO calculates energy conversion for a project it will by default do this by splitting the whole planning period into individual months and then calculate them one by one. This is primarily done to speed up the calculation. If you want a more precise optimization you can try to change this option to Year so that an entire year is calculated in one optimization. Be aware that this can be time consuming and will not always result in significant differences.
Transfer Storage
Transfer storage content between months is by default enabled.
The energy storage content is default zero in the beginning and end of a calculation.
When the Length of optimization period is set to Month the optimization period is one month plus one day. When the next month is to be calculated the storage content at the start is set equal to the storage content at the end at the previous month.
This means that the previous month has to be calculated before the next month can be calculated.
When this setting is disabled the calculation period is one month and at the end of the month the storage content is zero. In this way the next month can be calculated without having to wait for the previous month to be calculated.
Hereby, the different months can be calculated in parallel, enabling the full use of the computer’s multiple cores.
If you are calculating more years and this setting is enabled the calculations will still be done in parallel, however the month in the same year has to be calculated in serials.
Check input data
Selecting the arrow in the lower right corner give access to the project identification, where one further setting is available.
In the standard operation mode, energyPRO automatically checks the integrity of the data structure while editing. There are some cases often with comprehensive time series, where this checking is too time consuming to work with. In this case, you have the option to check the “Before calculation only”-option. This will remove the automatic integrity checking while editing and only perform it when making calculations.
Enable advanced features
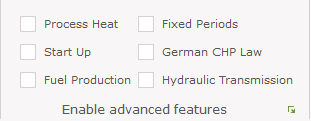
The available production options are:
- Process Heat, delivery of both heat and process heat
- Start Up, starting up production units is slow and expensive
- Fuel Production, fuel producing energy units in project
- Fixed Periods, enable units to operate in fixed periods
- German SHP Law, enable prioritizing of electricity demands
- Hydraulic Transmission, including pressure and velocity hydraulic constraints in transmission pipes
Process Heat
This is typical used in a situation with both high temperature process heat demands and low temperature domestic heating demands. If this option is selected you will have the option to add both the usual heat demands and process heat demands to your project, and to model production units having both heat and process heat productions. It is also possible to add a process heat storage.
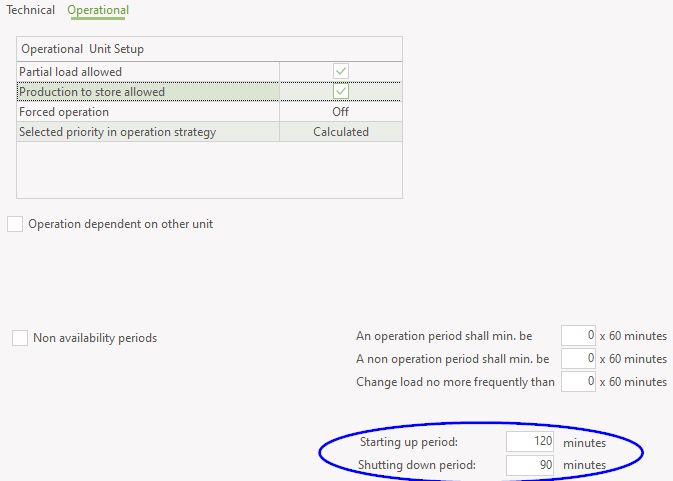
Start Up
The second option is used in situations, where the starting up time on a production unit is long and expensive. This could be the case in projects dealing with biomass and waste. If this option is selected there will be access to fill in the duration of starting up and closing down period when defining your production units.
Fuel Production
The third option enables fuel producing units, which can produce output fuel other units need as input. When this option is enabled a new data field appears in the energy conversion unit, Fuel output:

You must change the Production unit type to User defined. Then, Fuel output is added in the Power curves.
Fixed Periods
The fourth option you can select when you want to have the possibility of forcing energy conversion units to operate in fixed periods:
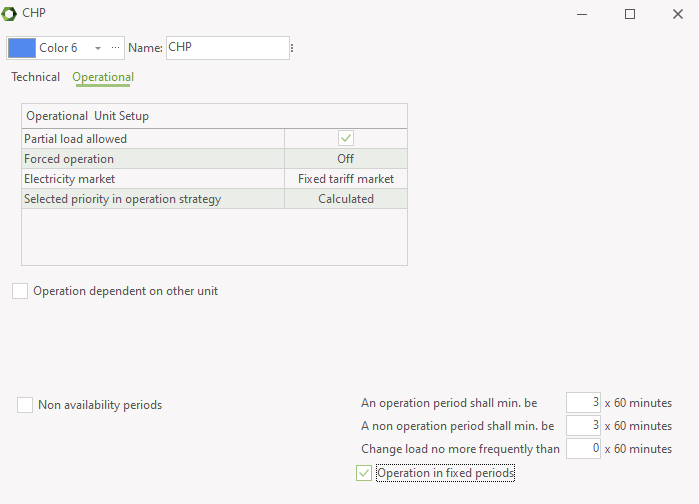
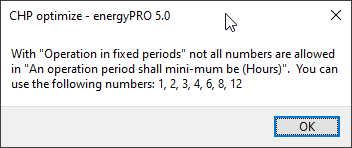
When enabling Operation in fixed periods, the unit will either have to produce or not produce in all the hours of each fixed period. Each day is split into fixed periods with the length specified in “An operation period shall minimum be”.. This means that in the example shown above a production period cannot start at e.g. 7 o’clock. It can only start at 00, 03, 06, 09, etc. Likewise the production can only end at the same hours.
Therefore, the “An operation period shall minimum be” can only have certain values when “Operation in fixed periods” is enabled:
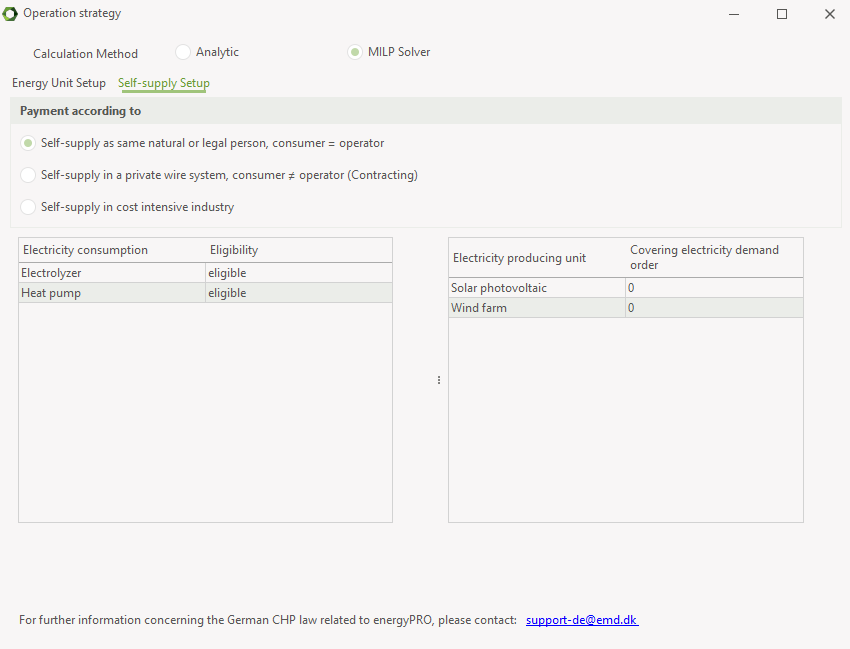
German CHP Law
Enable prioritizing of electricity demands for the German CHP law is only relevant if you want to calculate according to the German CHP law. When enabled you have a new tab in the operation strategy:
Hydraulic Transmission
When enabling the last item, Including pressure and velocity hydraulic constraints in transmission pipes, you have access to setting supply and return temperatures on the single sites and on transmissions you can set length, diameter, heat loss, etc. of the transmission and have the capacity and loss calculated. You also have access to the transmission, graphic report. Read more about this at the sections regarding Sites, Transmissions, Transmission, graphic report and in method of hydraulic calculation.
Warnings
Show Warning when Production and Consumption are not in balance.
By default, warnings are issued when having imbalance between production and consumption of Heat, Process heat, cooling or fuels, but not for electricity.
Operation Strategy
The operation strategy window shows the net production costs of the different energy conversion units, when possible to calculate.
Read more about Operation Strategy
Reports
All reports in energyPRO are located on the Reports tab.

They are grouped by types. For detailed information on the different reports go to the Reports section.
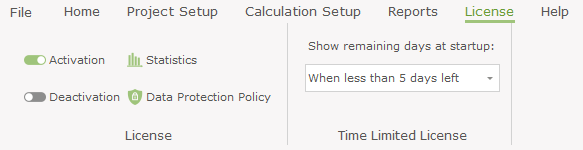
License
To work with energyPRO you need to activate your license. When ordering energyPRO you will receive a serial key or a license file needed for the activation.
The activation process in energyPRO is as described in License activation.
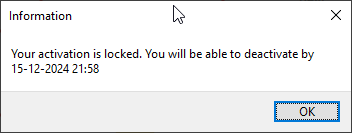
Deactivation can only happen after typically 30 days of activation. If trying to deactivate before that, you will see this message.
Further you can access your company activation statistics and EMD Data Protection Policy. On the activation statistics there is a link to online detailed activation information.
Help
The Help tab has three sections.

Around energyPRO the context sensitive online-help is activated by either choosing the help buttons or by pressing the F1-button.
Manual
This online manual can be accessed by this link.
Team Viewer Support
Selecting this option, you can initiate a Team Viewer session. During the energyPRO installation it is possible to exclude the installation of the Team Viewer app. You get access to that by choosing Custom setup.
Tutorials
Clicking this will open https://www.emd-international.com/energypro/support/ in your standard browser, where you can find tutorials on how to use energyPRO.
Check for updates
There are two ways to let energyPRO check for updates. One is by clicking “Check for updates” and another is by activating “Automatically check”, which lets energyPRO automatically check for updates at each energyPRO start-up.
About
In the “About” box you will find version number of your actual version of energyPRO and your registration data, where you can see which modules you have licensed.